Saturday, August 28, 2010

Crafts for little kids...

                                                       (sorry. this is the best picture I could manage this morning.)

Recently, my mom picked up a craft book for my daughter and I. She know's that we like doing crafts and I was grateful because it saves me time from scouring the internet for something "different" to do with her. It had so many unique and fun crafts in it. My mom was really loving one in the "Use your feet and hands" section. It was a little rug, and feet were used to decorate it. The one in the book the feet prints were arranged to look like a flower. And then just the toes and a little of the foot was used to make a border around the outside.

We went and picked up the supplies yesterday, and did the rugs. I have no pictures from the procces, not that it is hard. But, I think I may have gotten a few cute pictures out of it.

What you will need: acrylic paint in colors you like, cookie sheets or baking pans, paintbrush, large piece or paper, cotton throw rug.

So, you pretty much just get all your stuff ready. Pour the paint on your cookie sheet, and use a paintbrush to spread it. You can use the paper to experiment with mixing colors if you want, otherwise, you will not really need the paper.  Unless you also wanted to use it as a test to see how you want to put your footprints out on the rug. Then you just do whatever design you want to on the rugs. If you have a younger kid. I would suggest helping them out by picking them up and placing their feet in whatever design they want.

I would let you see how ours turned out, but I didn't get pictures of the one for my mom and grandma. And the one I got of my daughters, well, the picture just won't turn out.

Making


The Girl Creative

Wednesday, June 30, 2010

Would you look at that....

So, Saturday I had a party to go to. A close family friend was throwing a party for her daughter who turned 29. She just loves frogs and elephants. My mom told me she said that I would make a cake if Kathy, the friend wanted. So, I jumped at the chance, and just hoped I could make a pretty cool cake.

I looked all over the net for ideas and possible tutorials. For many, I would need a shaped cake pan, which by the time I decided to do the frog theme, it was too late and I didn't have the money for it anyways. And I would have had to get it online, which I waited til Friday to let my mom know what I needed to make it.

I found one that sounds great and pretty easy. I ended up making it my own kind of. I just got two white cake mixes and store bought buttercream icing. The tutorial said I needed a 8in square cake, and 9in round one and two cupcakes. As I said before, I waited to long. I realized I only had one thing, the cupcake pan. I ended up using a rectangle pan instead of square. And also used my springform pan for the round one. Which was a great idea.

So pretty much just bake the mixes as stated, or if by scratch do that. Make sure to make the 3 size cakes you need.
I put it in the fridge for the night, because lately, I can't just get rid of these fruit flies. They are few now though luckily.
I frosted it the next morning, just took and frosted the top of the cupcakes in white, then mixed up most of what was left and made that a limeish green, which I later used for spots.
I used what I had left from that and the other can to make a darker green. Then I frosted it, and it actually turned out nice and smooth, better than any other time I have ever done so.

Then I just used M&Ms, KISS ones at that, to make the eyes and mouth.


ETA: I realized that I never actually explained how to go about doing the cake. Once the cakes have cooled, you will want to take the square/rectangle one and cut it to make the legs and feet. You can see that the one foot looks a bit bigger, I cut that one too close and it came apart when I moved it. So, I had to try and get it in there just right. Which didn't go the greatest.
After cutting the legs/feet, you pretty much just frost the pieces and put them together. I frosted the cupcakes first, then the body, then the legs.

That is pretty much it.

giveaways  

Thursday, June 10, 2010

TS and that puffy paint!

So, first I am going to address the TS part. TS is Toy Society. I know that some of my followers know of it. But I am not actually sure how many of the blogs I follow know about it. There are so many talented ladies, that I'm sure would make some pretty neat things for this. I am making a couple little finger puppets for my drop.

I should probably explain what it is. It is, in a nutshell, anonymous handmade toys for perfect strangers. I will link it up, so you all can just check it out yourself, because I am at a loss for words on explaining it. Check it out here.

Now, today, while going around to the blogs I like to frequent. I saw this post on Skip to My Lou. I had seen this puffy paint in a craft book we took out of the library about a month ago, and I knew I wanted to make it then, but I totally forgot about it until seeing that post.  I suggest doing this, it was alot of fun.
And to end the post here are some pictures.


Puff is up momma, puff it up.

Wednesday, May 26, 2010

Silly Willy.

That is what my little one is always calling people recently. Well, this morning/noon, she was the silly willy. She only watches 3 shows a day, most days anyways, and those are Dora, or Diego. Max and Ruby and Ni Hao Kai Lan. Or if we get up early enough, she will watch 3 shows on Playhouse Disney instead, cause she loves Mickey Mouse.

Anyways, while watching Dora, she was doing really good at saying the words in Spanish, and telling Dora to take the azul path and not the rojo one. When Ki Lan comes on, there is a part where Ki Lan asks for help. She asks the veiwers to say the word for water in Chinese, which she then tells them. Then shes tells them to help, and says, say water in Chinese.
Well, here is little one sitting next to me, and when Ki Lan says that, she blurts out "water in Chinese", instead of the word Ki Lan told the meant water in Chinese. I was giggling about it pretty much the rest of the show, I love these moments.

Anyone else have any they care to share?

Monday, May 24, 2010

Bookmarks!

I wanted to make something that I knew for sure people would use, so for Christmas last year, I made a few throw pillows(like my sister is in love with anything with peace signs, so i did her's and sewed a peace sign on the front), and bookmarks.

I scoured the web, looking for some ideas. I found some, but I didn't find one that I just loved.(and also had the materials on hand to be able to make). Like those book thongs, I would love to be able to make those, but don't have the materials, and don't want to infringe on my future SIL territory, she is into making jewlery and those book marks.

First, I just sat around wondering what the heck I was going to do. I had ribbon in front of me, and thought I could incorporate it in some way. I could still make a book thong, but I would use the ribbon, and use some kind of fabric to cap off and decorate the ends. And it would be more like a thong than the actual ones,  those are more like book g-strings(hahaha).

So, anyways. You going to want the ribbon that has scalloped edges, If you know what I mean.

You going to want to go up diagonally. So start at one end, with one side of the ribbon, and put it through a scallop. Then go across to the other piece of ribbon, and go through that, and keep going up till the end.

(sorry the picture is soo icky. Camera phone.)
Once I finished the ends off, I took some felt and sewed it around the ends. Sometimes I make one end kind of decorative, for the one in the picture I just took a tiny bow and sewed it on. I made one for my future SIL, not the one that does the jewelry, and did one end to look like a giraffe, I wish I had a picture of it to show.

And that's that. I am going to link it up a few places, if you have something you would like to link up, just push one of the buttons below!

Making
Keeping It Simple


Sunday, May 23, 2010

Sock Monkey...and The Toy Society!

I suppose I should just tell what Toy Society is first, that way you don't forget why I randomly added that in at the end of the tutorial. I am sure some of you know what it is already, but for those who don't, here goes.
It is pretty much, people making handmade toys, and leaving them in public places for perfect strangers to find. Here is a link to learn more about what it is, and how it got started: click here to learn more!

Anyways, I first saw this on this blog, Delilah's Momma - Work, Play, Sew, Eat., and thought it was such a neat thing to do. It could really brighten someone's day, or just give them something new to play with.

On to the sock monkey. (I honestly need to get a battery for my new camera!) I don't have any pictures of it as I was going along, and I honestly had the hardest time finding an actual tutorial on the web. I wish I had saved it or something, because I would just link that up for the pictures and such.

Here is a picture of it finished.  The first thing you will need to do is get a pair of knee high socks, I got mine from Kohl's, but when I was in at Deb's with my sister getting her Prom dress, I noticed they had tons in all different designs and colors.
Take one of the socks and turn it inside out, then line it up so that the heel is centered

Thursday, May 20, 2010

Next time won't you sing with ME!!


So, for my little one's birthday this year, which isn't until September, I am making all the gifts I am giving her.

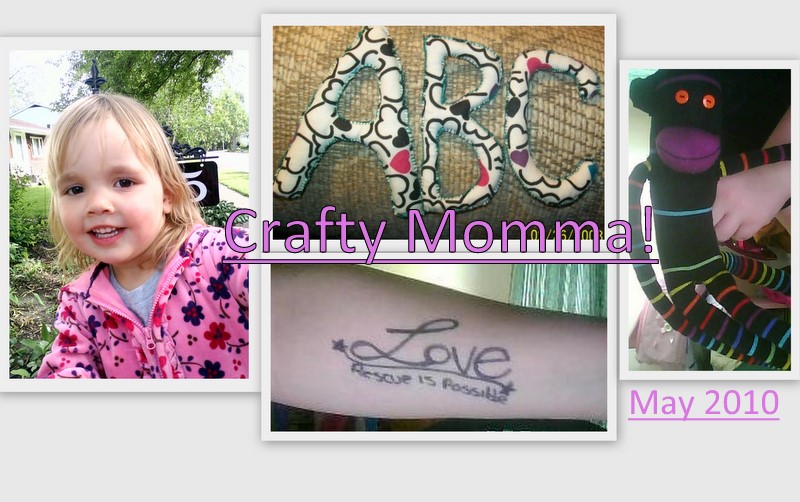
I am currently working on a alphabet. I got some fabric from my SO grandmother awhile back, and wasn't sure what I was going to do with it. I finally decided I wanted to make something with it. She will be three this year, and kind of knows her ABC's, but she skips some letters and such still. Now, she can learn them, and recognize the letter it is too. She already does so with the letter's in her name.

Anyways, on to the craft.

I cut up the fabric for this awhile ago, so no pictures of that. But I basically cut a square about 6x6. Then, as I go, I freehand whatever letter I am at onto the fabric. I am sewing it up with a blanket stich around the whole outside edge.
I know this isn't much help, but it is pretty straightforward.

I wish I could take another better picture, but all I have now is the webcam.


The Girl Creative


The Girl Creative

Wednesday, April 21, 2010

To Write Love On Her Arms


You were created to love and be loved. You were meant to live life in relationship to other people, to know and be known. You need to know that your story is important and that you're part of a bigger story. You need to know that your life matters... You need to know that rescue is possible, that freedom is possible, that God is still in the business of redemption. -TWLOHA ♥

This is for my mom. It has been almost 6 years or so. She tried to commit suicide. She was very depressed at the time, and things that had happened recently didn't help any. Luckily, after downing a bottle of her prescription pills, she called her mother and her sister. (My aunt and grandma obvisouly). And they called an ambulance to the house and came and got my sister and I. I didn't even know any of that had happened till my aunt woke me up.

I am glad that she called someone, where would I be without her. I don't even want to think about that.

If you don't know what To Write Love On Her Arms is, I encourage you to go to twloha dot com. And push on the vision tab, read what they are all about...

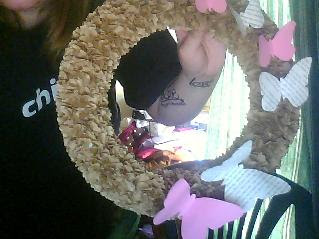
Spring Wreath!


I got this idea from this blog MaryJanes and Galoshes. She has some very cute ideas, I think I may have even found a link to this wreath from another blog on a crafty link day.

I don't have a camera to make my own tutorial to this, which is why I linked it up.
I do have a picture of the finished product though. But since I made it and had it hanging, one of the butterflies fell off.

The picture isn't the best as my camera is not working.

Saturday, January 16, 2010

So, I have decided

that I am going to start posting the things I do in my crafty free time here. I have been looking at tons of different craft blogs and such. And that is where I have come to get this new craftiness from. And I would like to link to the original blogs that I get my ideas from, but most the things I do, I end up forgetting where I got the idea from. So, to anyone that see's one of their ideas on my blog, PLEASE speak up. And I will gladly link to you!

I probably won't be posting too often, because I don't have the time, or because I just haven't done anything to blog about.